Source Control
Workspaces, projects, and underlying resources manipulated in Semarchy xDI Designer use local file storage. To facilitate team collaboration, we recommend using a version control system such as Git.
The EGit plugin is shipped with Semarchy xDI Designer to control sources with Git.
The source control repositories can either be configured using a configuration file or directly in the Semarchy xDI Designer.
Configure Repositories using the configuration files
Summary
Git repositories can be configured using one of the configuration files of the EGit plugin.
This is the preferred method to configure the source control repositories automatically when working inside an automated CI-CD chain or when preparing a preconfigured Designer.
| The Git repositories must already exist locally, previously cloned, or created with any of your preferred tools. |
| Alternatively, for end-users, the Git repositories can be configured graphically in the Designer. See Configure Repositories in Semarchy xDI Designer. |
SSH Configuration
If the GIT repository is accessed through SSH, the necessary SSH information must be defined.
-
Navigate to the
[local drive]/[Semarchy xDI Designer workspace folder]/.metadata/.plugins/org.eclipse.core.runtime/.settings/folder on your computer. -
Open the
org.eclipse.jsch.core.prefsfile or create it if it does not exist. -
Add the following keys in the file:
-
PRIVATEKEY=<Private Key File Name 1>,<Private Key File Name 2>,… -
SH2HOME=<Path to the folder containing the private keys.>
-
For example:
PRIVATEKEY=cddoe-private-key-file
SSH2HOME=C:\\Users\cddoe\.ssh
GIT Configuration
To configure the GIT repositories:
-
Navigate to the
[local drive]/[Semarchy xDI Designer workspace folder]/.metadata/.plugins/org.eclipse.core.runtime.settings/folder on your computer. -
Open the
org.eclipse.egit.core.prefsfile or create it if it does not exist. -
Add the following keys in the file:
-
eclipse.preferences.version=1 -
GitRepositoriesView.GitDirectories=<Repo File Path 1>;<Repo File Path 12;… -
GitRepositoriesView.GitDirectories.relative=<Repo File Path 1>;<Repo File Path 12;…
-
filePath should contain the path of the Git folder containing internal git data.
| In Windows, the ':' character is escaped using a backslash and '\' is doubled. |
For example,
eclipse.preferences.version=1
GitRepositoriesView.GitDirectories=C\:\\Users\\cddoe\\git\\xdi-repository-1\\.git;C\:\\Users\\cddoe\\git\\xdi-repository-2\\.git
GitRepositoriesView.GitDirectories.relative=C\:\\Users\\cddoe\\git\\xdi-repository-1\\.git;C\:\\Users\\cddoe\\git\\xdi-repository-2\\.git
Configure Repositories in Semarchy xDI Designer
Summary
The following sections describe how to configure the source control graphically in Designer. Refer to the EGit User Guide for more information.
| The configuration can be defined alternatively through configuration files. See Configure Repositories using the configuration files. |
Identify Yourself
Start by verifying the username and email that will be used when you commit changes.
-
Click Window > Preferences > Team > Git > Configuration.
-
Verify the existence and the value of the following properties or add or update them if needed:
-
user.email: Your email address. -
user.name: Your Git username.
-
-
To add a missing property, click Add Entry.

Clone an existing project from a GitHub repository
| SSH is the recommended authentication method for GitHub. |
To connect to an existing repository using SSH and clone its content:
-
Verify your SSH connection:
-
Click Window > Preferences.
-
Navigate to General > Network Connections > SSH2.
-
Ensure that your SSH2 home is configured correctly (the usual value is ~/.ssh) and that the Private Keys list contains a SSH2 key that is declared on GitHub.
-
If a key is missing, click Add Private Key to add it.
-
To generate a new key:
-
Select the Key Management tab.
-
Click Generate RSA Key.
-
Click Save Private Key. The saved key is automatically added to the list of keys in the General tab.
-
Select and copy the content of the public key to the clipboard.
-
Add this public key to your GitHub account. Refer to Authentication for more information.
-
-
-
-
Click Window > Perspective > Open Perspective > Other.
-
Select Git and click Open.
-
Select Clone a Git repository in the Git Repositories perspective.
-
Enter the connection parameters and click Next:
-
URI: ssh://git@github.com/<user_or_organization>/<repository>.git with:
-
<user_or_organization>: User or organization that hosts the repository.
-
<repository>: Name of the repository.
For example, git@github.com/mycompany/repo.git
-
-
Host: Automatically filled. Leave unchanged.
-
Repository Path: Leave unchanged.
-
Protocol: SSH (Leave unchanged).
-
User: git (Leave unchanged).
-
Password: Leave empty.
-
-
Select the branches you want to synchronize and click Next.
-
On the next and last page of the wizard, enter the Local Destination parameters:
-
Directory: The directory that will contain the Git repository (created by the wizard if it does not exist).
It is recommended to store the Git repository outside the Designer workspace. -
Initial branch: Select the local branch to check out initially.
-
-
Click Finish.
-
Add projects from the Git repository to your workspace:
-
Right-click Working Tree in the Git Repository and select Import Projects in the contextual menu.

-
Select the projects to import and click Finish.
-
Commit and Push Changes
To share your changes with other designers working on the same project, you need to stage, commit and push these changes to the Git repository:
-
From the Git or the Semarchy xDI Designer perspective, open the Git Staging view.
If the Git Staging view is not visible, click Window > Show View > Git Staging.
-
Select the Unstaged Changes you want to commit and click the
 button to add them to the list of Staged Changes.
 -
Enter the Commit Message and click:
-
Commit and Push to commit the changes and push them immediately to the remote Git repository.
-
Commit to only commit the changes and push them later.

-
To push changes that have already been committed:
-
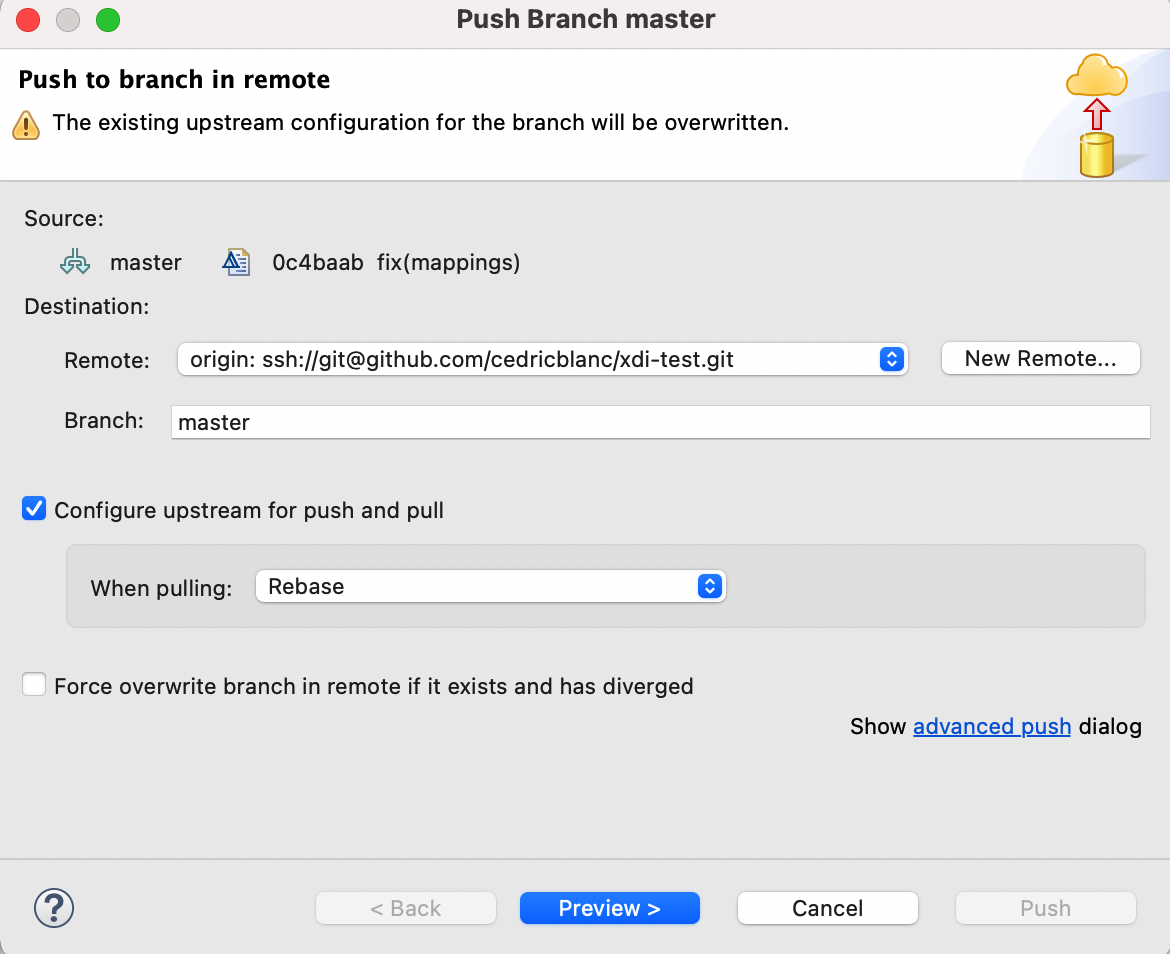
From the Semarchy xDI Designer perspective, in the Project Explorer view, right-click the project in which you have committed changes and click Team > Push Branch {branch name}.
-
Review the Source and Destination parameters (in particular the destination Branch), select the desired merge or rebase method in the When pulling dropdown list and click Preview.

-
After verifying the result of the push preview, click Push.
